
Scheduling a Form
Set the schedule that works for your business to ensure your staff are completing their Food Safety forms.
In this Article
The scheduling of your forms is what determines where they show up on the app and when.
Quick Guide
- Log in to the Admin Console (Web Browser)
- Go to Forms
- Click on the pencil (edit) icon beside the form you want to schedule
- Go to Form Schedule and click the drop-down
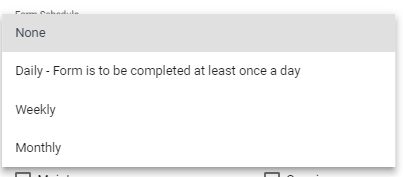
The following options will be displayed

Schedule a time for a Daily Form
- Ensure that 'Daily - Form is to be completed at least once a day is selected.
- To schedule a form at a certain time of day, alter the time displayed from '12:00 pm' (default) to the time you would like the form to be completed.
- Click on the grey plus sign and the time will be displayed in the area below. You may schedule the form for another time of day by repeating this process e.g. you may want to have the bathroom checked every 2 hours during your opening times.

If you do not open on a Monday or you want to repeat a form only on two days of the week then remove ticks from the other days of the week. The form will only be displayed on the Diary page of the Safe Food Pro mobile application on the days you select.
You can also choose to repeat a form monthly or select specific months when you want a form to appear. This is useful for calibration of thermometers, setting a twice-yearly premises audit or if you have a seasonal business.

Scheduling Options
When scheduling a form several options are available:
None - Default
In the default scheduling setting, this form will not appear on any of the tabs on the Diary and will only be accessed through an ad hoc form (clicking on the green plus in the bottom right-hand corner.).
Daily - Form is to be completed at least once a day
This option schedules the form so that it appears on the Diary each day (On the "Today" tab). When you select this scheduling you can change the time(s) at which this form is required to be done by, and the days of the week that it appears.
The times are changed via a selection of three drop-down arrows. Use this to configure the time that you want, then hit the grey plus. You can do this as many times as you would like.
The days of the week are easy to change; just select or deselect.Weekly
This option schedules your form to once a week, and it can be completed on any day of that week. It will appear on the "This Week" tab on the Diary.
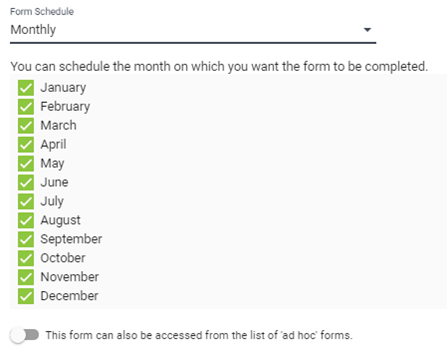
Monthly
This option schedules your form once a month, and it can be completed at any time during that month. It will appear on the "This Month" tab on the Diary.
Additionally, this option can be changed so that it only appears during selected months, just select or deselect the months in the list below. By default every month is selected.
Ad Hoc Option - Turning off a Form Completely
All forms have a toggle below them "This form can also be accessed from the list of 'ad hoc' forms." which is on by default. When this option is on, the form can be selected as an Ad Hoc form from the Green Plus at the bottom of the Diary. Selecting a scheduling option turns this off.

Forms that have been turned off will be hidden from your list of forms. To show these forms when looking at the list, click 'Show Unused Forms':

Note: If a form is not scheduled and you have disabled the Ad Hoc option, the form will not be accessible from the mobile. This will be denoted by a red warning triangle next to the form in the form list.
